
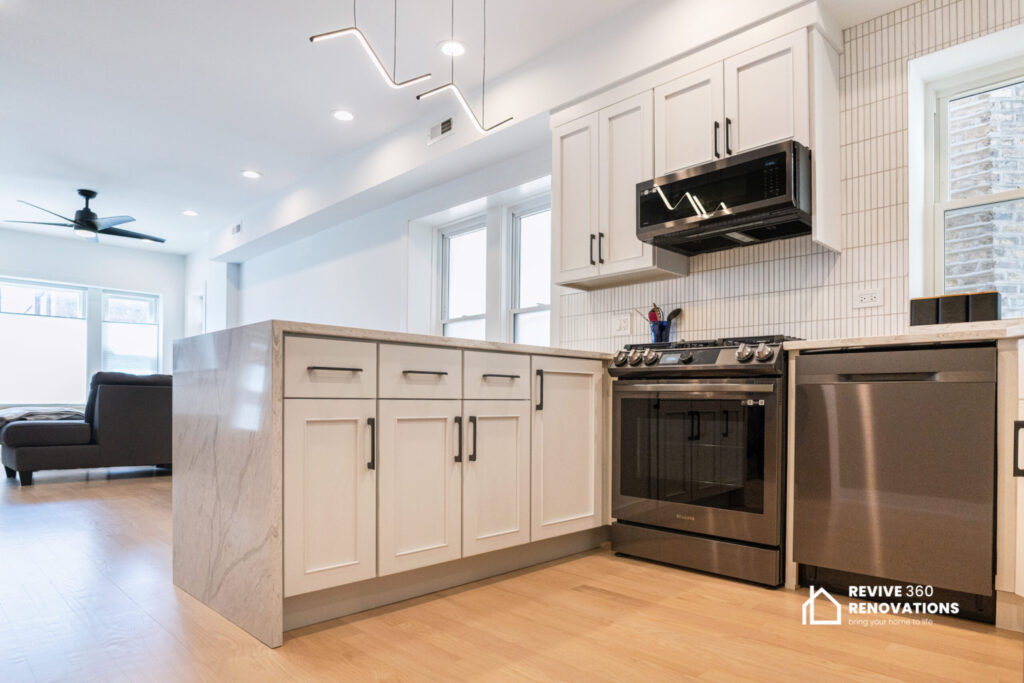
Dated cabinets can drag down a kitchen or bathroom, and repainting them can transform the space without a full remodel budget. The real question isn’t whether to paint your cabinets — it’s whether to do it yourself or hire a professional. The honest answer depends less on how handy you are and more on what your time and patience for a multi-day process are worth. This guide covers the real cost and time of DIY cabinet painting, the equipment it requires, where DIY jobs go wrong, what professional painting includes that a weekend project doesn’t, and how to choose the right path for your budget and timeline.
Key Takeaways
- DIY is cheaper upfront but far more time-intensive: expect $200–$600 in materials and 20–40 hours of work over a week or more, versus a flat professional quote and a few days of disruption.
- Surface prep determines whether the paint job lasts: degreasing, sanding, and priming are non-negotiable steps most failed DIY finishes skipped or rushed.
- A sprayed finish looks far smoother than brushed or rolled cabinets: getting that factory-like result without a spray booth or HVLP sprayer is the hardest part of doing it yourself.
- Professional cabinet painting includes steps most homeowners never budget for: door removal, dust-controlled spray booths, and multi-day cure times between coats.
- Conversion varnish and catalyzed finishes used by pros cure far harder than most retail cabinet paints: that difference shows up in how cabinets hold up to daily use years later.
- The right choice depends on cabinet condition, budget, and timeline, not just skill: solid wood boxes in good shape, a flexible schedule, and a lower budget lean DIY; anything else usually leans professional.
The Real Cost of DIY Cabinet Painting
On paper, DIY cabinet painting looks like the obvious money-saver. Materials for an average kitchen — sandpaper, degreaser, primer, paint, brushes or a sprayer rental, tape, and drop cloths — typically run $200 to $600. A professional quote for a full kitchen usually runs $3,000 to $9,000 depending on cabinet count, condition, and finish quality, so the DIY math looks easy at first glance.
What that comparison leaves out is time. A typical kitchen has 20 to 30 doors and drawer fronts, each needing cleaning, sanding, priming, and two topcoats with drying time between steps. Most homeowners fit this around a full-time job and spend 20 to 40 hours on the project over one to two weeks. A rushed step or a bad batch of doors adds even more time and cost. The real comparison isn’t “$400 versus $6,000” — it’s “$400 plus two weeks of evenings and weekends” versus “$6,000 and someone else’s two weeks.”
What You’ll Actually Need for a DIY Cabinet Paint Job
Painting cabinets well requires more equipment than painting a wall, and skipping any of it is where DIY results start to suffer.
Surface Prep: The Step Most DIYers Rush
Kitchen cabinets accumulate cooking grease that ordinary cleaning doesn’t remove, and paint won’t bond over it. A degreasing cleaner followed by sanding with 120- to 220-grit sandpaper to scuff the finish is essential, even on cabinets that look clean. Skipping degreasing is the single most common reason DIY cabinet paint peels or chips within the first year. Sanding also matters on glossy or factory-finished surfaces, since paint and primer need a slightly rough surface to grip.
Sprayer vs. Brush and Roller
This decision most affects the final result. A brush and foam roller are affordable, but even careful work leaves faint brush marks or a textured “orange peel” finish up close. An HVLP sprayer produces a smoother, more even coat, but it takes practice, ventilation, and masking to avoid drips and overspray. Renting or buying one adds $100–$300, and cabinet doors aren’t the ideal place to learn.
Primer and Topcoat Choices
Cabinets need a bonding primer made for glossy or previously finished surfaces, not a standard wall primer. Most homeowners choose a hybrid enamel (durable, self-leveling, brushable or sprayable) or a waterborne alkyd for the topcoat. Two full coats are the minimum for even color and durability, and each needs its full dry time before the next — rushing this step causes tackiness and poor adhesion later.
Where DIY Cabinet Painting Projects Go Wrong
Most DIY cabinet paint jobs don’t fail because of the color chosen — they fail from predictable technical issues. Drips and brush marks are the most visible problem, usually caused by applying too much paint at once or working in a space too warm or humid for it to level before setting. Dust contamination is another common culprit: painting in a garage, basement, or occupied home lets airborne dust settle into wet paint, leaving a gritty texture that’s hard to fix without sanding back and repainting.
The finish that fails most often isn’t the color coat — it’s the bond between paint and a surface that wasn’t degreased and sanded thoroughly enough. Cabinets near the stove and range hood are especially prone to this, since grease buildup is heaviest there. A finish that isn’t hard enough also shows wear, chipping, and yellowing faster than expected, sometimes within a year, even when it looked fine on day one.
What Professional Cabinet Painting Actually Includes
A professional job looks similar on the surface — cabinets get cleaned, sanded, primed, and painted — but the process is built to eliminate the failure points above.
Door Removal and Spray Booth Setup
Professional crews typically remove all doors, drawer fronts, and hardware and paint them in a dedicated, dust-controlled spray booth rather than in the kitchen. This keeps dust out of the wet finish and lets every surface, including edges and door backs, get sprayed evenly instead of brushed around hinges. Cabinet boxes that stay mounted are sprayed on-site with the area fully masked, which is why teams like Revive 360 Renovations bring plastic sheeting, ventilation, and containment systems as standard parts of a professional kitchen cabinet painting job.
The Finish Systems Professionals Use
Most professional cabinet painters use conversion varnish, catalyzed lacquer, or waterborne enamel systems not sold at retail paint counters. These finishes cure through a chemical reaction rather than simple evaporation, producing a far harder, more scratch-resistant surface. Controlled drying environments, often with filtered airflow, also shorten the wait between coats compared to air-drying at home.
Durability and Warranty: DIY vs Professional Finishes
Durability is where the gap between DIY and professional cabinet painting shows up most clearly — usually months or years later. Retail enamel paints can look excellent right after the project, but many aren’t formulated to withstand daily friction — hands, cleaning products, pots and pans bumping edges — as well as conversion varnish or catalyzed finishes. Cabinets finished with professional-grade conversion varnish typically resist chipping and wear for eight to fifteen years, compared to two to five years for a well-executed DIY enamel job.
Warranty coverage is the other major difference. A DIY project has no warranty — any peeling or chipping is the homeowner’s problem to fix. Reputable renovation companies back their cabinet refinishing work with a labor and finish warranty, which matters most for high-traffic households, rentals, or kitchens with heavy daily use.
How Long Each Approach Really Takes
Timeline is often the deciding factor for busy households. A DIY project realistically takes one to two weeks from first cleaning to final coat, assuming no major mistakes — a rushed step or an unexpected redo can push it to three weeks. Cabinets are typically unusable in stages during that time, which is disruptive in a kitchen a family relies on daily.
Professional jobs are faster in calendar time despite having more steps. Most full-kitchen projects finish in three to five business days, since crews work in parallel — spraying doors off-site while boxes are prepped and sprayed in place — using faster-curing finish systems. The crew will be in the home for that window, but it’s still shorter than most DIY timelines.
Choosing the Right Path for Your Kitchen or Bathroom
There’s no universally right answer — it comes down to cabinet condition, budget, and timeline. Solid wood boxes that are just cosmetically dated, a flexible schedule, and a lower budget favor DIY with proper prep and a hybrid enamel. Heavy daily use, a desire for a smooth sprayed finish, a tight timeline, or avoiding a multi-week project favor professional work instead.
Scope matters too: a small bathroom vanity is far more forgivable to DIY than a full kitchen, with fewer doors and less exposure if something goes wrong. For vanity and cabinet painting, DIY risk is lower; for a whole-kitchen repaint, the case for professional work grows. Homes built before 1978 add a consideration: if the existing finish might contain lead paint, the EPA’s Renovation, Repair, and Painting guidance outlines safe sanding practices, and ventilation should follow guidance from the U.S. Consumer Product Safety Commission.
Frequently Asked Questions
Is it cheaper to paint cabinets myself or hire a professional?
DIY is cheaper in materials alone, typically $200–$600 versus $3,000–$9,000 professionally. Factor in 20–40 hours of labor, potential redo costs, and the shorter lifespan of most DIY finishes, and the true gap narrows considerably.
Can I paint cabinets without removing the doors?
You can, but it’s much harder to get an even, drip-free finish around hinges and edges, and you risk paint sealing hardware shut. Removing doors and drawer fronts is standard practice for careful DIYers and professionals alike.
What’s the best paint for kitchen cabinets?
A hybrid enamel or waterborne alkyd made for cabinetry is the best retail option for DIY projects, applied over a bonding primer for glossy surfaces. Professional crews typically use conversion varnish or catalyzed finishes, which aren’t widely available at retail but cure significantly harder.
Do painted cabinets hold up as well as new cabinets?
A well-executed paint job on solid, structurally sound boxes can perform very close to new cabinets in appearance and durability. Finish quality matters more than the fact that it’s paint — a professional-grade finish on existing boxes often outlasts a rushed DIY job on brand-new cabinets.
How long do painted cabinets need to cure before I can use my kitchen normally?
Most cabinet finishes are dry to the touch within a day but need 7 to 14 days to fully cure. Light use is fine within a couple of days, but avoid heavy scrubbing, hanging towels on doors, or stacking items on shelves until the finish has fully cured.
Should I paint or replace my cabinets?
If your cabinet boxes are solid, square, and free of water damage, painting is almost always more cost-effective than replacement and achieves a comparable visual update. Replacement makes more sense if the boxes are damaged or the layout no longer works for the space.
Is cabinet painting messy or disruptive to live through?
DIY cabinet painting in an occupied kitchen is fairly disruptive since doors are missing and surfaces are off-limits for days at a time. Professional crews minimize this by painting doors off-site and using containment systems on-site, which shortens the disruption to a few days.
If your cabinets are ready for a refresh but you’d rather skip the sanding dust and guesswork, the team at Revive 360 Renovations has spent 16 years helping Chicago homeowners get a durable, professional finish without the trial and error. Reach out through our contact page to talk through your cabinets, timeline, and budget, or browse our past projects to see what a spray system can deliver.