
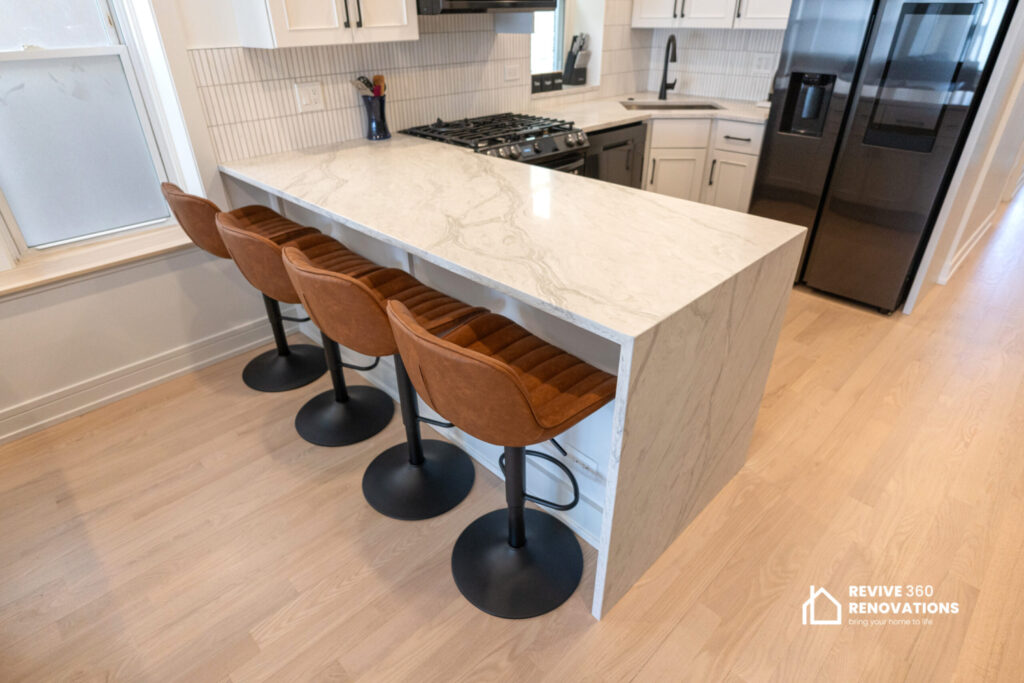
A kitchen island should be the hardest-working surface in the room, not just the prettiest one. Homeowners often start planning with a Pinterest board full of waterfall quartz and pendant lighting, then reach the framing stage and realize the walkway behind it is too tight to open the dishwasher. The difference between an island you love and one you resent usually comes down to a handful of measurements: clearance, overhang, outlet placement, and real storage. A well-designed island earns its square footage by combining prep space, seating, storage, and traffic flow into one cohesive layout, get any one of those wrong and the whole kitchen feels cramped. This guide covers the zones, clearances, and materials that separate a functional island from an expensive obstacle.
Key Takeaways
- Function before finish: Decide what the island needs to do, prep space, seating, appliance housing, or storage, before choosing its shape or material.
- Respect the clearance minimums: Aim for at least 42 inches of walkway on all sides, and 48 inches where two people will work or pass at once.
- Match overhang to seating style: Counter-height seating needs a 15-inch overhang; bar-height needs 12 inches and taller stools.
- Plan utilities early: Outlets, prep sinks, and cooktops require rough-in work before cabinetry and countertops are installed.
- Size to the room, not the trend: A 10-foot island looks stunning in a showroom but can strangle circulation in a standard Chicago kitchen.
- Budget for the extras: Plumbing, electrical, and waterfall edges typically add more to an island’s cost than the cabinetry itself.
1. Start With a Job Description for Your Island
Before sketching dimensions, write down what the island is actually for. A family that hosts frequently might prioritize seating and a beverage station; a household with one primary cook might want maximum prep space instead. Trying to make one island do everything, full prep zone, seating for four, a cooktop, and open shelving, is how islands end up oversized and overcrowded.
Think of the island in zones: prep, landing, seating, and storage. Most islands handle two of these well and a third in a limited way. If your perimeter counters already offer strong prep space, the island might be better used purely for seating and storage. Homeowners who define the island’s primary job before choosing its size consistently end up happier with the final layout than those who design by looks alone. A kitchen layout redesign that considers the whole room’s workflow, not just the island in isolation, prevents retrofitting headaches later.
2. Clearance and Circulation: The Rules That Make an Island Livable
Clearance is the single most under-planned aspect of island design, and the hardest to fix after installation. The island has to coexist with open appliance doors, someone bending down to load the dishwasher, and two people passing during a dinner party.
Minimum, Comfortable, and Generous Clearances
The NKBA’s planning guidelines are the industry benchmark most designers and contractors work from:
- 36 inches: absolute minimum, suited only to a single-cook kitchen with no secondary traffic.
- 42 inches: the comfortable standard, allowing someone to pass behind a person working at the island.
- 48 inches: recommended for the primary walkway in a two-cook household or an open floor plan.
Measure from the island’s edge to the nearest counter, wall, or appliance, not to the center of the walkway. If you’re planning for aging in place, check clearance against the ADA’s accessible design standards, which call for at least 40 inches in primary pathways and more where a 180-degree turn is needed. In an open concept kitchen remodeling project, circulation matters even more, since the island often anchors the space between kitchen, dining, and living areas.
3. Seating That Actually Gets Used
Island seating fails more often from bad ergonomics than bad design taste. The most common post-move-in complaint isn’t stool style, it’s that the overhang is too shallow for anyone to sit without knees hitting the cabinet face.
Overhang and Height Standards by Counter Type
The overhang, how far the countertop extends beyond the cabinet base to create knee space, needs to match the counter height:
- Standard-height counters (36 inches): built for prep, not seating; use chairs rather than stools if seating is added.
- Counter-height seating (36 inches): needs a 15-inch overhang and 24–26-inch counter stools.
- Bar-height seating (42 inches): needs only a 12-inch overhang but taller 28–30-inch bar stools.
A 15-inch overhang is the number most contractors treat as non-negotiable for counter-height seating, anything less and adults will sit sideways to avoid knee contact. Overhangs beyond that need corbels or steel brackets underneath, since unsupported quartz and granite can crack under weight. Budget roughly 24 inches of width per person, a 6-foot island comfortably seats three, not four, once real elbow room is accounted for.
4. Electrical and Plumbing: Plan Before You Build
Utilities get cut late in the process more than any other feature, unfortunately, retrofitting an island for power or water after cabinets are set costs far more than planning ahead.
Outlets and Code Requirements
Most residential codes require at least one GFCI-protected receptacle on an island countertop over a certain minimum width. Homeowners often want this hidden, pop-up outlets that recess into the countertop cost more than a wall-mounted receptacle and need periodic seal maintenance, so discuss visible-but-cheaper versus integrated-but-pricier placement with your electrician early.
Prep Sinks and Cooktops
Adding a prep sink or cooktop increases both function and cost, since it means running supply, drain, gas, or electric lines through the floor below. A prep sink helps in larger kitchens, but in smaller ones it can eat into space better used for landing groceries. A cooktop creates a gathering point but needs proper ventilation and rules out open seating on that side for safety. Any plumbing or gas work should be roughed in before drywall and flooring are finished, since moving it later means cutting into a completed floor.
5. Choosing a Countertop Material That Matches How You Cook
The countertop is both the visual centerpiece of the island and its most heavily used surface, so material choice should weigh durability and maintenance as much as appearance.
Quartz is the default recommendation for most islands: non-porous, needs no sealing, and resists staining better than natural stone, at roughly $70–$120 per square foot installed. Granite offers similar pricing and natural variation but needs annual sealing. Butcher block is warmer and cheaper ($40–$70 per square foot) for a prep-focused section, though it needs periodic oiling and isn’t ideal near a sink. Marble is the highest-maintenance choice, prone to etching from acidic foods, and best reserved for display rather than daily workhorse. For an island that sees daily food prep, quartz is almost always the more practical long-term investment over natural stone. A kitchen countertops and backsplash consultation is worth scheduling before finalizing cabinetry.
6. Storage That Earns Its Keep
An island’s storage should be planned around specific items, not generic “cabinet space,” which leads to deep, awkward cabinets that become junk drawers.
Drawers vs. Cabinets vs. Open Shelving
- Deep drawers: best for pots, pans, and small appliances, everything stays visible and reachable without kneeling.
- Pull-out cabinets: better for larger, less-frequent items like mixing bowl sets.
- Open shelving: good for cookbooks or display on the seating side, but only if it will stay tidy.
- Trash and recycling pull-outs: frees up under-sink space elsewhere.
Toe-kick drawers add storage for flat items like baking sheets without losing cabinet height. Islands that combine a deep drawer bank with a dedicated trash pull-out consistently rate higher in homeowner satisfaction than islands built with standard cabinet doors alone.
7. Sizing Islands for Small and Mid-Size Kitchens
Chicago’s bungalows, two-flats, and vintage condos often have footprints that simply can’t support a sprawling island, and that’s fine, since a smaller island done well beats a large one that chokes the room.
In a tight kitchen, consider a rolling island or a narrow galley-style island (as little as 24 inches deep) for landing space and storage without demanding full clearance on both sides. A peninsula, connected to a run of cabinetry on one end, adds counter space and seating while needing clearance on only three sides, often the deciding factor in a small galley kitchen. If floor space genuinely can’t fit a fixed island, a furniture-style cart with locking wheels offers similar benefits without the commitment. In kitchens under roughly 150 square feet, a peninsula or rolling island usually delivers more real-world function than a fixed island sized down to fit.
8. Common Sizing and Planning Mistakes
A few mistakes show up again and again, and most are avoidable with a tape measure before cabinets are ordered. The most frequent is sizing the island to the room’s square footage rather than the clearance it leaves behind, it can look proportionate on paper and still leave only 30 inches of walkway once door swing is factored in. A close second is skipping the overhang-and-stool math, leaving seating nobody uses. Many also underestimate how much a waterfall edge or integrated sink adds to the budget. Walking through the space with painter’s tape marking the footprint and clearance lines before committing to cabinetry is one of the simplest ways to catch these mistakes while they’re still free to fix.
9. What a Kitchen Island Actually Costs
Island costs vary widely by size, material, and utilities. A basic island with stock cabinetry and a laminate or butcher block top runs $1,500–$4,000. A mid-range island with semi-custom cabinets, quartz, and an electrical outlet falls between $4,000–$9,000. A fully custom island with a waterfall quartz top, a prep sink, and custom storage can climb to $9,000–$18,000 or more once rough-in work is included. Utility work, new electrical, gas, or plumbing lines, is consistently the line item homeowners underestimate most, sometimes adding $1,000–$3,000. A detailed quote through a kitchen island installation consultation helps avoid mid-project surprises.
Frequently Asked Questions
What is the minimum size for a kitchen island?
Most designers recommend a minimum footprint of about 4 feet by 2 feet (roughly 40 x 24 inches). Anything smaller functions more like a cart, though a narrow rolling island can still work.
How much clearance do I need around a kitchen island?
Plan for at least 42 inches on all sides, and 48 inches on the primary walkway if two people cook. Never go below 36 inches, even in the smallest layouts.
Can I put a sink or cooktop in my island?
Yes, but both require new plumbing or gas/electric lines roughed in before flooring and cabinetry go in. A cooktop also needs proper ventilation, typically a downdraft system or overhead hood.
How many people can comfortably sit at a kitchen island?
Budget roughly 24 inches of counter width per person. A 6-foot island seats about three comfortably, while an 8-foot island can seat four with proper overhang and spacing.
Do I need a permit to add electrical or plumbing to an island?
In most municipalities, yes, a new circuit, outlet, or plumbing line typically requires a permit and inspection. A licensed contractor familiar with Chicago building codes can confirm requirements and pull permits.
Is a kitchen island worth it in a small kitchen?
It can be, but a peninsula or narrow rolling island often fits better than a full fixed island when square footage is limited, since it preserves needed clearance.
Designing an island that works for your household takes more than picking a countertop, it means measuring clearances, planning utilities early, and matching size to how your kitchen really gets used. If you’re ready to put a plan on paper, the team at Revive 360 Renovations has spent 16 years helping Chicago homeowners design kitchens that function as well as they look, reach out anytime to talk through your space.