
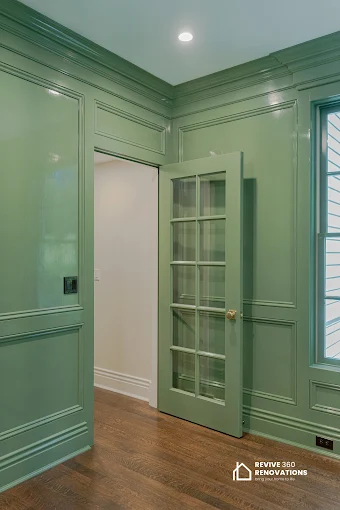
A fresh coat of paint can transform a room faster than almost any other home improvement project, but a professional-looking finish rarely comes down to paint brand or color. It comes down to what happens before the roller touches the wall. The single biggest predictor of a paint job’s longevity and appearance is the quality of the surface preparation underneath it. This guide walks through every stage of getting your walls ready—cleaning, patching, sanding, priming, taping, and setting up your workspace—along with the shortcuts that lead to peeling and visible flaws down the road.
Key Takeaways
- Clean walls first, always: Dust, grease, and grime prevent paint from bonding properly, no matter how good the paint is.
- Patch before you sand: Filling nail holes, dents, and cracks before sanding creates a seamless, invisible repair once painted.
- Primer isn’t optional for every job: Stains, drastic color changes, bare drywall, and repaired patches all require primer to get an even, lasting finish.
- Glossy surfaces need to be dulled: Paint won’t adhere well to shiny finishes unless you scuff them with sandpaper first.
- Good lighting reveals the truth: Raking light from a work lamp exposes imperfections that overhead lighting hides until the paint has already dried.
- Rushing prep costs more than it saves: Most callbacks and redo jobs trace back to skipped cleaning, sanding, or priming steps.
Clear the Room and Protect What Stays
Before cleaning or repair work begins, set up the room so nothing gets damaged. Move furniture to the center and cover it with plastic sheeting, or move it out entirely if you have the space. Remove outlet covers, switch plates, curtain rods, and wall hardware—painting around these items always produces a sloppier line than painting a bare wall and reinstalling afterward. Lay drop cloths across the entire floor, since drips and dust travel farther than expected.
This is also the right time for a walkthrough with fresh eyes. Rooms that look “fine” from a normal standing position often reveal scuffs, dings, and old repairs once you look specifically for wall damage. If you’re planning a larger renovation alongside your paint refresh, it’s also worth deciding whether outdated wallpaper needs to come down; professional wallpaper removal services can strip old adhesive and backing cleanly without tearing into the drywall underneath, saving prep time versus fighting stubborn glue residue yourself.
Clean and Degrease Every Wall
It’s tempting to skip straight to patching and sanding, but paint applied over dirty walls fails faster than almost any other prep mistake. Dust, cooking grease, hand oils near light switches, and household grime create a barrier between the wall and the paint, leading to peeling and poor adhesion within months rather than years. Wipe down every wall with a mild detergent solution—a few drops of dish soap in warm water works well—paying extra attention to kitchens, bathrooms, and walls behind furniture where dust accumulates undisturbed.
In kitchens especially, grease travels farther than you’d expect from the stove, settling as an invisible film across nearby walls and ceilings. A wall that looks visually clean can still carry enough grease residue to cause paint adhesion failure, so don’t skip this step just because a wall appears spotless. Rinse with clean water and let everything dry completely—painting over a damp wall traps moisture that causes bubbling and mildew behind the new coat.
Patch Holes, Cracks, and Damaged Drywall
Nail holes, dents from furniture, hairline cracks near doorframes, and dings from moving boxes all need to be addressed before you pick up a paintbrush. For small nail holes and minor dents, a lightweight spackling compound applied with a putty knife and left to dry fully is usually sufficient. For larger holes or seam cracks, a joint compound applied in thin layers—drying between coats—gives a stronger, flatter repair than filling everything in one pass.
Cracks that keep reappearing, especially near ceiling corners or above doorframes, often indicate a structural or settling issue rather than cosmetic damage. Recurring cracks in the same spot mean the underlying drywall or framing needs attention, not just another layer of spackle. In these cases, or with water damage or holes needing a patch panel, bring in a drywall repair specialist who can cut, replace, and finish the section so it blends invisibly once painted.
Sand Every Surface Smooth
Once patches are fully dry, sanding turns a lumpy repair into an invisible one. Use fine-grit sandpaper (220-grit is a safe standard for interior walls) and sand in circular motions until the patched area feels flush with the surrounding wall by touch, not just sight. Wipe away all sanding dust with a tack cloth or damp rag before moving forward—painting over dust bakes a gritty, uneven texture into your finish.
Dealing with Glossy or Semi-Gloss Surfaces
Trim, doors, and older walls painted in semi-gloss or high-gloss finishes present a challenge: new paint doesn’t bond well to a shiny surface. Lightly sanding these areas to create a dull, matte texture—called “scuffing” or “de-glossing”—gives the new coat something to grip onto. Skip this step and you risk peeling within weeks, even if the rest of your prep was flawless.
Lead Paint Safety in Older Chicago Homes
Many homes in Chicago’s older neighborhoods were built before 1978, when lead-based paint was still common. Sanding or scraping old paint in a pre-1978 home without proper precautions can release hazardous lead dust into the air, a serious health concern for children and pregnant women. Before sanding or scraping older surfaces, consult the EPA’s Renovate Right guide for lead-safe practices, and consider a professional paint test if you’re unsure of your home’s history.
Prime Before You Paint
Primer gets skipped more often than any other step, usually because homeowners assume the paint itself will handle everything. That assumption often leads to blotchy coverage, visible patch marks, and colors that look different from the swatch. Primer creates a uniform, sealed surface that allows your topcoat to go on evenly and show its true color.
When Primer Is Non-Negotiable
Certain situations make skipping primer a guaranteed problem. Stains from water damage, smoke, marker, or crayon bleed through multiple coats of regular paint unless sealed with a stain-blocking primer. Freshly patched areas absorb paint differently, creating visible “flashing” unless primed first. Bare drywall is porous and soaks up paint unevenly, and a drastic color change—dark navy to soft white, for example—needs primer (often tinted) to keep the old color from ghosting through.
Master the Art of Taping
Clean paint lines separate an amateur job from a professional one, and it comes down almost entirely to taping technique. Apply painter’s tape to trim, baseboards, and ceiling lines, pressing it down firmly with a putty knife or fingernail to seal the edge—any gap lets paint bleed underneath and create a fuzzy line once removed. For the cleanest results, brush a thin layer of the wall’s existing color over the tape edge before your main coat; this seals tiny gaps with a color that won’t show if it seeps through.
Timing matters as much as application. Removing tape too late, after paint has fully cured, risks pulling up flakes of dried paint with it, so pull tape while the final coat is still slightly tacky, at a 45-degree angle in one steady motion.
Set the Stage: Ventilation, Lighting, and Workflow
Good prep isn’t only about the walls—it’s about setting up conditions that let you work well. Open windows or run a fan to keep air circulating, both for comfort and to help paint cure properly; poor ventilation traps fumes and slows drying, particularly in bathrooms and smaller rooms.
Lighting deserves more attention than most people give it. Overhead ceiling fixtures flatten shadows and hide imperfections, patches, and roller marks. A portable work light positioned at a low angle across the wall—called raking light—reveals texture flaws and missed spots that standard room lighting hides until it’s too late to fix easily. Do a final check with this lighting before considering the wall fully prepped, and again after each coat dries.
Avoid the Prep Mistakes That Ruin a Paint Job
Even careful homeowners fall into predictable traps. Painting over dust or sanding residue leads to a gritty texture that’s nearly impossible to fix without starting over. Skipping primer on stains, patches, or bare drywall is another, and it’s almost always visible within the first few weeks. Rushing dry times between coats traps moisture and leads to soft spots, bubbling, or poor adhesion, and working in dim, single-source lighting means missed spots go unnoticed until the room is back in normal use.
If your project spans more than a single room, the prep workload multiplies quickly, and consistency between rooms becomes its own challenge. Many homeowners tackling a whole house painting project find that an experienced crew handling the prep phase saves time and prevents the small inconsistencies that show up when DIY techniques vary room to room.
Frequently Asked Questions
How long does it take to properly prep walls before painting?
For an average room, thorough prep—cleaning, patching, sanding, and priming—typically takes a few hours to a full day, depending on how much repair is needed. Rooms with significant damage or heavy grease buildup will take longer, and rushing this stage is the most common reason paint jobs need to be redone.
Do I really need to prime every wall before repainting?
Not every wall needs primer, but many situations do: stains, bare drywall, patched areas, and major color changes all require or benefit from it. Applying a similar color over a previously painted wall in good condition may not strictly need primer, though it never hurts.
What’s the best way to fix nail holes before painting?
A lightweight spackling compound applied with a putty knife and sanded smooth once dry works well for small nail holes. Let the patch dry fully before sanding, since sanding wet spackle creates a mess rather than a smooth surface.
Can I paint over glossy walls without sanding?
It’s not recommended. Glossy and semi-gloss finishes are too smooth for new paint to grip properly, which often leads to peeling. A light sanding to dull the sheen gives the new coat something to grip.
How do I know if my home has lead-based paint?
Homes built before 1978 are the most likely to contain lead-based paint, since it was banned for residential use that year. A certified test kit or professional inspection can confirm it, and the EPA’s Renovate Right guide outlines safe practices.
What’s the biggest mistake homeowners make when prepping walls?
Skipping the cleaning and sanding steps is the most common mistake, since walls that look clean or smooth to the eye often aren’t clean enough for paint to adhere properly. This shows up later as peeling, uneven texture, or visible patch marks.
Should I hire a professional for wall prep, or can I do it myself?
Many homeowners handle basic cleaning, minor patching, and taping themselves successfully. However, significant drywall damage, lead paint concerns, or large multi-room projects are often better left to professionals who can ensure consistent, safe results.
If you’d rather skip the ladder, sandpaper, and guesswork, the team at Revive 360 Renovations has spent 16 years perfecting the prep-to-finish process for Chicago homeowners. From patching and priming to a full-scale interior painting refresh, we’re happy to walk through your space and discuss what it takes to get it done right. Reach out at (773) 345-6358 or info@reviverenovations.com.