
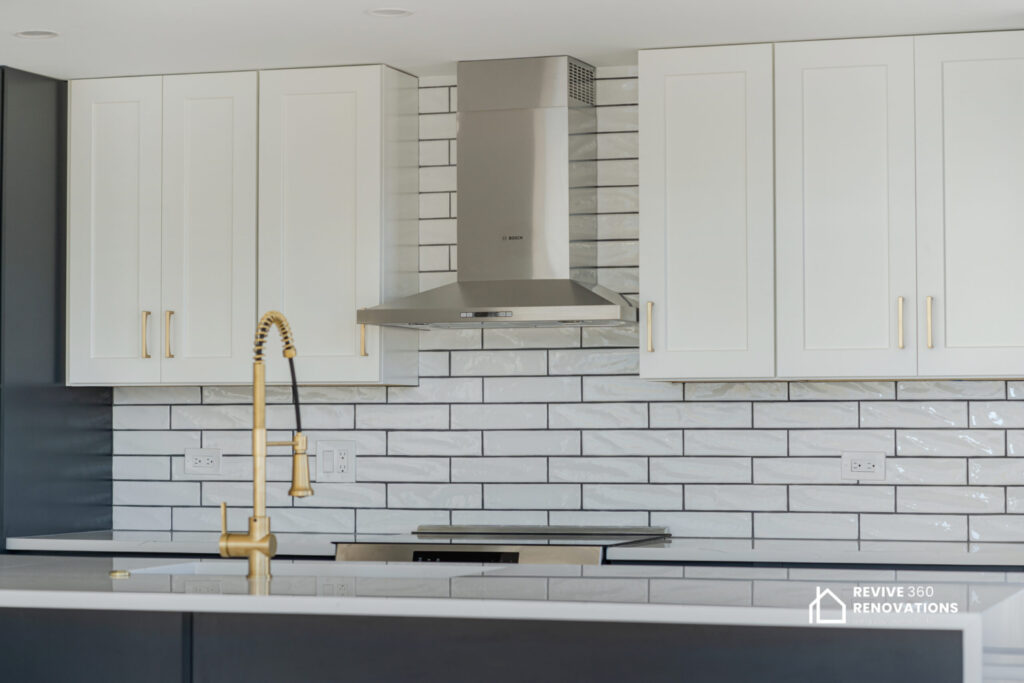
You have a countertop picked out, the cabinet color is settled, and now a showroom wall of tile samples is asking you to commit to one more surface. Choosing a kitchen backsplash feels like a purely visual decision, but it is also the surface that takes grease from the stove, water from the sink, and a daily beating from sponges. Pick well, and it disappears into an easy-to-clean kitchen. Pick based on looks alone, and you may scrub grout lines for years.
This guide covers how to match a backsplash to the way you cook, how to pair it with counters and cabinets, how the main materials compare, and what layout, outlet, and installation decisions follow. It also flags the mistakes we see most often in Chicago homes, where tight kitchens and older walls change the rules.
How Do You Choose a Backsplash for Your Kitchen?
Start with how you use the room, not with a catalog. A backsplash has one job before it has a style: protect the wall and wipe clean easily.
If you sear and pan-fry often, the wall behind the range takes the worst of it, so a smooth, low-porosity surface with narrow grout lines beats textured stone or wide-joint handmade tile. If you bake more than you sauté, flour dust matters more than grease, and almost anything works. If the sink wall sees heavy use, consider water and how the finish handles constant wiping.
Picture cleaning it after a messy dinner. Deep texture, open pores, and many grout joints all take longer. That doesn’t rule out character tile; it just means placing it deliberately, like handmade tile away from the stove and something plain and glazed behind the cooktop.
Pairing the Backsplash with Countertops and Cabinets
Let one surface be the star. If your countertop has strong veining, a quiet backsplash lets it shine. If the counters are a calm solid, the backsplash is the place for pattern or texture. Two competing statements make a kitchen feel busy.
Undertones matter more than most people expect. A warm white cabinet beside cool gray tile can look slightly off even though both are neutral. Look at samples together, in your own kitchen, at the time of day you use it most. Many Chicago kitchens have limited or north-facing light, so a sample that looks crisp in a showroom can turn flat at home.
For more combinations, see our post on which countertops and backsplashes work best together. If the counter itself is still undecided, our comparison of quartz vs. granite countertops is a good first step, because the countertop should be chosen before the backsplash, not after.
Backsplash Materials Compared
There is no single best material, only the best fit for your cooking habits, budget and tolerance for upkeep. This table compares the common options in relative terms.
| Material | Best for | Watch for | Upkeep and relative cost |
|---|---|---|---|
| Ceramic tile | Nearly any kitchen, from classic subway to handmade looks | Glaze quality varies; wide grout joints collect grease | Easy to clean; usually the most budget-friendly permanent option |
| Porcelain tile | Heavy-use kitchens, stone or concrete looks | Harder to cut and set, so labor can run higher | Very durable, low maintenance; mid-range |
| Glass tile | Dark kitchens that need reflected light | Needs a flat wall and careful setting; flaws show | Wipes clean easily; mid to higher cost |
| Natural stone | Warm, one-of-a-kind character | Porous types can stain or etch and need sealing | Highest upkeep; mid to high cost |
| Metal (such as stainless steel) | Pro-style, modern or industrial kitchens | Fingerprints, dents and scratches | Heat tolerant, easy to wipe; cost varies widely |
| Slab or full-height | Seamless looks with almost no grout | Fabrication and outlet cutouts need precise planning | Easiest to maintain; usually the highest cost |
| Peel-and-stick | Rentals, short-term updates, testing a look | Adhesive can fail near heat and moisture | Cheapest upfront; lowest durability |
Ceramic and porcelain are the workhorses: they handle heat and moisture and are straightforward to repair. Marble, travertine, and limestone are porous, so seal them and be honest about whether you will reseal. Peel-and-stick works as a temporary fix, but keep it away from the stove.
A slab backsplash carries the countertop material up the wall, sometimes to the ceiling behind a range. The appeal is almost no grout and the easiest cleaning of any option. The tradeoff is precision: outlet cutouts and wall flatness must be planned before fabrication, because a slab cannot be trimmed on site like tile. If a slim, continuous surface appeals to you, consider our Thinscape countertop service.
Tile Size, Layout and Grout
Small tile, such as mosaics and subway, adds texture and forgives uneven walls. Larger tile reads calmer and means fewer grout lines to scrub, but any bump in the wall shows. Pattern matters too: running bond and herringbone look very different in the same tile.
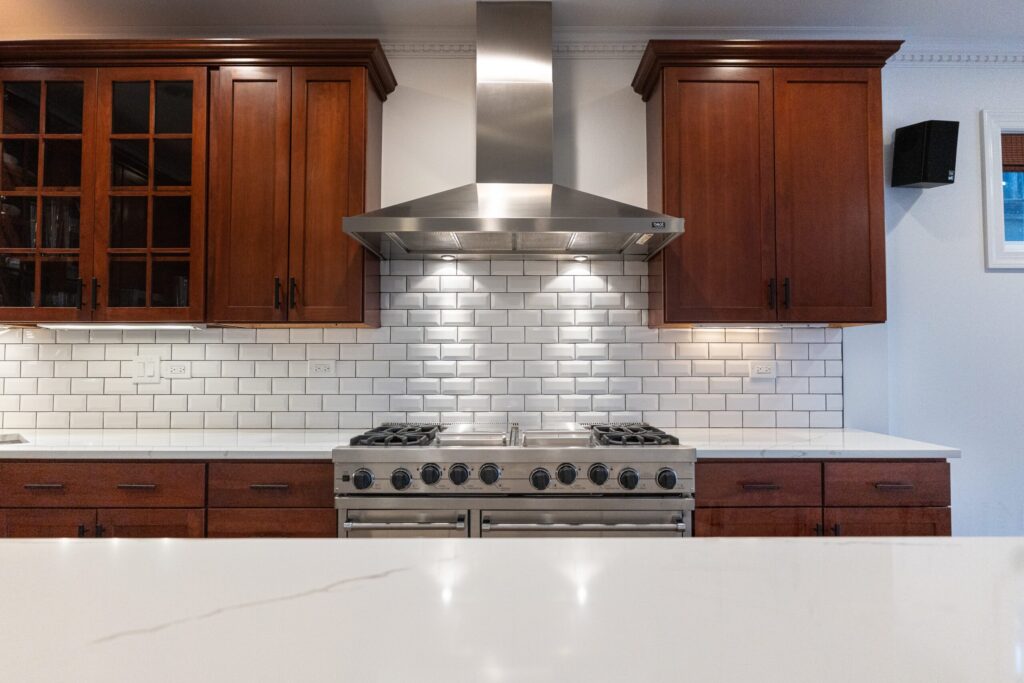
Whatever you choose, the installer should dry-lay the tile and center the pattern on a focal point, usually the range or window, so you don’t end up with thin slivers at the corners. Ask to see a layout plan, even a sketch, before anything is glued.
Grout is the quiet decision with loud consequences. A color close to the tile hides stains and reads as one plane, while high-contrast grout turns the pattern into a graphic grid. Narrower joints are generally easier to keep clean. In busy cooking zones, ask about stain-resistant or epoxy grout, though your tile setter should choose it, since it behaves differently during installation.
Heights, Outlets and Switches
Most backsplashes run from the counter to the underside of the upper cabinets, and on walls without uppers, such as behind the range or beside a window, running tile higher gives a more finished look than stopping at an arbitrary line.
Decide outlet and switch locations before tile goes up, because moving them afterward means cutting finished material. Adding or relocating outlets or under-cabinet lighting is electrical work. According to the City of Chicago Department of Buildings, tiling and similar finish work without plumbing or electrical connections does not require a building permit, but electrical alterations are a different matter. Rules vary by municipality and project, so North Shore and Northwest suburbs may differ from the city, and your contractor should confirm what applies.
Behind the Range: Heat and Splash
The wall behind a stove asks the most of a backsplash. Choose a material that tolerates heat and wipes clean without staining, which usually means glazed ceramic or porcelain, metal or a slab. Avoid exposed painted drywall or adhesive-backed products in the immediate cooking zone.
Clearances between a cooktop and nearby materials and cabinetry come from the appliance manufacturer’s installation instructions and local code, not from what looks good. Read the manual for your specific range, and have your contractor confirm the backsplash and any hood or shelf above it comply.
Why Installation and Substrate Prep Matter
A beautiful tile on a poorly prepared wall is an expensive problem waiting to happen. The surface needs to be sound, clean, and flat enough for the tile you chose, which is why large tile and glass are less forgiving than small ceramic. In older Chicago buildings, plaster, patched drywall, and layers of old paint can compromise adhesion, so address them before the first tile goes up.
The standard reference for tile installation methods in North America is the Tile Council of North America Handbook, which the Ceramic Tile Education Foundation describes as guidance covering substrate flatness, mortar coverage and grout joint sizing rather than a rigid standard. In practice, professionals follow an established method rather than improvise.
A typical installation follows this order: the old backsplash comes off, the wall is repaired and prepped, the layout is dry-fit, and the tile is set in the correct adhesive. After curing, it is grouted and cleaned. Natural stone and some grouts need sealing, and the joints where tile meets countertop and cabinets are finished last with flexible caulk, because those joints move.
Where the Backsplash Fits in the Timeline
Install the countertop first, then the backsplash. We template counters after the base cabinets are set, and we measure tile from the finished counter so the joint is right. Order tile early, since specialty and natural stone can have long lead times, and make final selections before demolition, not during it.
In our Marshfield St. kitchen renovation in Lakeview, cabinetry, countertops, tile, and the plumbing and electrical behind them were rebuilt as one scope. That coordination avoids cutting finished tile for an outlet.
Small Kitchens and Older Chicago Homes
Chicago kitchens are often small, with few windows, especially in vintage buildings and condos. A light, reflective backsplash can make a tight room feel larger, and running tile to the ceiling draws the eye up. Keep pattern scale modest in a small room. Older walls are rarely flat or plumb, and condo buildings often restrict work hours, so plan for wall prep and check your building’s rules first.
Common Backsplash Mistakes
- Choosing tile before the countertop, then finding the two clash.
- Skipping a layout plan and ending up with thin cut tile at corners.
- Ignoring outlet and switch placement until the tile is up.
- Treating wall prep as optional, which is where most failures begin.
Frequently Asked Questions
What is the easiest backsplash to keep clean?
A smooth, glazed ceramic or porcelain tile with narrow grout lines, or a slab with almost no joints, is easiest. Textured tile and porous stone take more effort because grease and stains settle into the surface.
Should the backsplash match the countertop?
It does not have to. Many designers let one surface carry the pattern while the other stays quiet. Matching works well when you want a seamless look, such as a slab backsplash in the same material as the counter.
How high should a kitchen backsplash go?
Most run from the counter to the bottom of the upper cabinets. On walls without uppers, extending to the ceiling gives a more finished look and protects more of the wall.
Can I install a backsplash myself?
Small-format projects are manageable for a confident DIYer, but tile setting is a skilled trade. Layout, wall prep and cutting around outlets are where mistakes happen, and electrical changes belong with a licensed professional.
Can peel-and-stick work as a permanent backsplash?
It is better treated as a temporary or budget option. Adhesive can lose its grip over time in the heat and moisture around a sink or stove, so it is a poor fit for long-term kitchen use.
Conclusion
Choosing a kitchen backsplash comes down to a few honest questions: how you cook, how much cleaning you will tolerate, what your counters and cabinets already say, and how well the wall behind it is prepared. Settle those, plan outlets and layout early, and the finish you love will last.
If you want a second opinion on samples or a wall you are unsure about, our team can talk through options on our kitchen countertop and backsplash page and help sequence the work.